How Much Time Do I Need to Replace the Timing Belt?
The timing belt synchronizes the rotation of the crankshaft and camshaft. It is an essential part of an automobile’s engine. The timing belt may need to be replaced if it becomes worn, develops cracks, or loses tension over time.
There are a few justifications for replacing your car’s timing belt on an ongoing basis. The causes of this are:
- Preventive Maintenance
- Age and Mileage
- Avoiding Catastrophic Engine Damage
- Concomitant Component Replacement
- Manufacturer`s Recommendations
- Optimum Engine Performance
Pay attention this blog for a detailed examination of how long does it take to replace a timing belt, the warning signs, symptoms, and fixes for defective alternator.
How Long Does It Take to Replace A Timing Belt?
The length of a timing belt replacement can vary based on a number of variables. These are the vehicle’s model, the engine layout, and the mechanic’s level of expertise.
- Timing belt replacement typically takes between two and six hours.
- The time of the task may be increased by replacing extra parts such the water pump, tensioner, or idler pulleys.
- The length of time needed for replacement varies depend on the engine’s complexity and how easily it can be accessed.
- It may be more difficult to reach and service the timing belt on some engines due to their complex configurations or constrained space.
- It is advised to review the manufacturer’s specifications or receive guidance from a certified mechanic or dealership to obtain a more precise estimate for your particular car.
What Kinds of Tools Are Necessary to Replace the Timing Belt?
Depending on the type and model of the car as well as the engine layout, different tools could be required. Here are a few instruments frequently used in timing belt replacements:
- During the procedure, numerous bolts and fasteners are planned to be loosened and tightened using wrench and socket.
- To remove stress from the timing belt tensioner, a tool called a timing belt tensioner is required.
- To remove the crankshaft pulley, use the crankshaft pulley removal tool.
- To keep the camshafts in a fixed position, a camshaft locking tool is required.
- To remove it securely, a Harmonic balancer puller is required.
- A torque wrench is required to tighten nuts precisely.
- Components like the water pump or the timing belt cover may need gasket and sealant.
Read Also: Serpentine Belt Noise When Accelerating – [Try This Easy Fix!]
How to Repair the Timing Belt? (Detailed Guide)
A timing belt replacement is a difficult process that needs technical instructions and accuracy. Nonetheless, the following provides a broad outline of the procedures required in timing belt replacement:
1. Preparation:
- Put the parking brake on and park the car on a level surface.
- To avoid any electrical mishaps, disconnect the negative battery connector from the battery.
- Gather all the equipment and tools required.
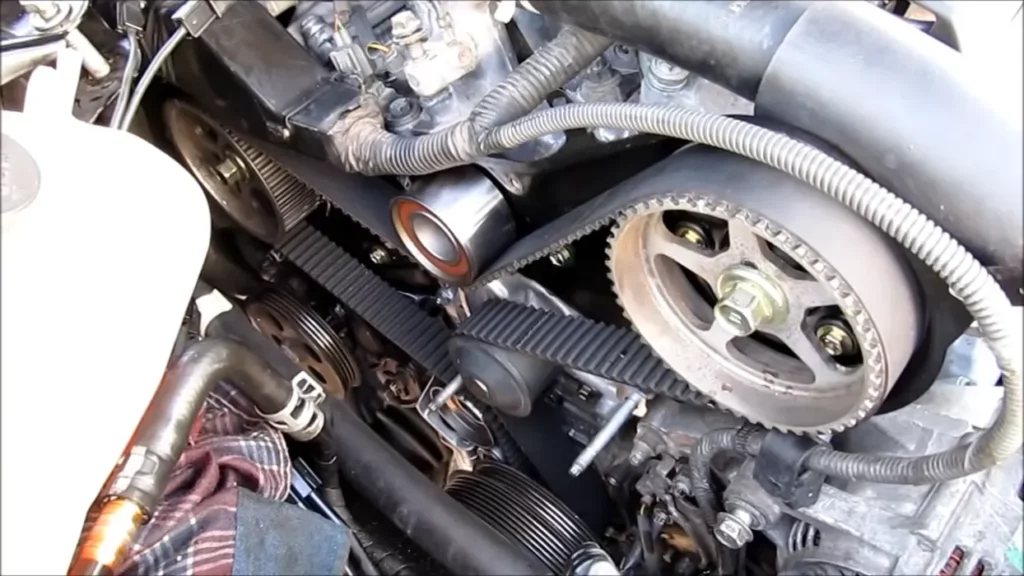
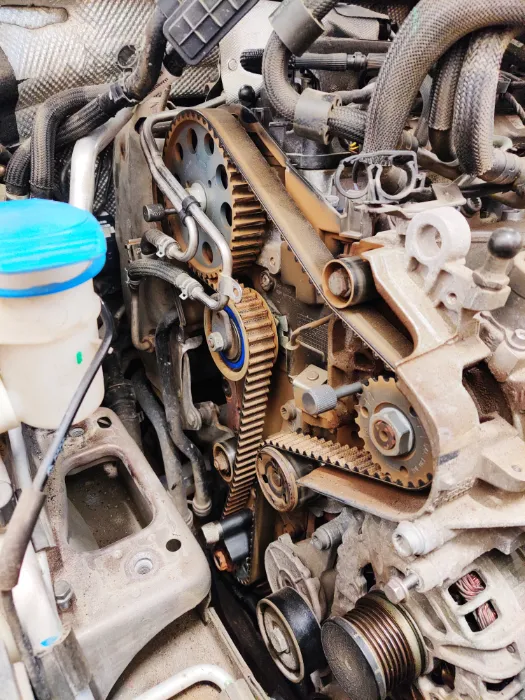
2. Accessing the Timing Belt:
- As directed in the repair manual, remove any elements impeding the timing belt. These are the engine cover, accessory drive belts, or other parts.
- To reveal the timing belt and associated components, find the timing belt cover and take it off.
3. Remove Idler and Tensioner Pulley:
- For removing the tension from the belt, find the timing belt tensioner and apply the proper tool.
- Remove the tensioner and idler pulley, if necessary.
4. Alignment and Timing Marks:
- The timing markings on the crankshaft, camshaft, and other relevant parts should be noted. These indications guarantee that the timing belt is properly aligned.
- In accordance with the manufacturer’s instructions, align the timing markers. This can entail utilizing a crankshaft pulley tool to rotate the engine.
5. Taking off the Previous Timing Belt:
- Loosen the timing belt’s tension and move it off the pulleys while observing its route of travel.
- Check the old timing belt for wear, damage, or cracks. At this point, if required, replace the water pump, idler pulleys, and belt tensioner.
6. Installing the New Timing Belt:
- Install the replacement timing belt on the crankshaft pulley first.
- When threading the belt onto the camshaft pulley or pulleys, as well as any other necessary pulleys, make sure that it is properly tensioned.
- To ensure the belt is in the right place, double-check the alignment of the timing markings.
7. Tensioning the Timing Belt:
- Utilizing the tensioner properly requires according to the manufacturer’s instructions.
- Make sure the belt has the proper amount of deflection or tension recommended in the instructions and apply tension uniformly throughout it.
8. Reassembly:
- If the tensioner and idler pulley were taken out, put them back in place.
- Replace the timing belt cover and any other parts that were previously taken apart.
9. Testing and Final Inspection:
- Check that the timing belt is moving freely and isn’t obstructed or misaligned by turning the engine manually a few times.
- After rotating the engine, verify that all timing markings are still appropriately aligned.
- The negative battery terminal must be reconnected.
Read also: 6 Reasons Why Does My Serpentine Belt Keep Coming Off
Frequently Asked Questions [FAQs]
Does the time required to replace a timing belt depend on the replacement of other parts?
Yes, it’s frequently advised to replace the timing belt together with other parts like the water pump, tensioner, or idler pulleys.
How can I receive an estimate for my particular car that is more accurate?
It is recommended to ask for guidance from a reputable technician.
What happens if the timing belt isn’t changed on schedule?
A worn or broken timing belt might fail if it is not replaced, severely damaging the engine or possibly causing it to fail entirely.