How To Fix Starter Grinding Noise? – 5 Reasons To Check
When you start your car and hear a grinding noise from the starter, it can be a frustrating and alarming problem. The starter is a crucial component of a car’s engine system, responsible for starting the engine by turning the flywheel.
A grinding noise from the starter can indicate a severe problem that requires immediate attention. Read on to learn its causes, symptoms, diagnosis, and solutions.
What Causes The Grinding Noise from Starter?
There are several factors that can contribute to the grinding noise from your starter, and they include:
- Worn-out starter motor gear
- Faulty starter solenoid
- Improper starter installation
- Damaged flywheel teeth
- Low battery voltage

Let us dive deeper into these causes.
Worn-out Starter Motor Gear –
Over time, the starter motor gear can wear out due to continuous use, causing them to grind when starting the engine.
Faulty Starter Solenoid –
The starter solenoid is responsible for engaging the starter motor with the engine. A faulty starter solenoid can cause the starter to grind against the flywheel teeth, resulting in a grinding noise.
Improper Starter Installation –
If the starter is not installed correctly or aligned with the flywheel teeth, it can cause grinding noise when starting the engine.
While starters come by default, there are still a few reasons why they may need to be installed perfectly, resulting in grinding noise when starting the engine.
One possible reason is that the starter bolts may have been over-tightened, causing misalignment with the flywheel teeth. Overtightening sometimes results in stripped or broken threads, making correct starting installation difficult.
Damaged Flywheel Teeth –
The flywheel is a large metal disk that connects to the engine crankshaft and has teeth on its circumference.
These teeth engage with the starter motor gears to turn the engine. If the flywheel teeth are damaged or worn out, it can cause grinding noise from the starter.
Low Battery Voltage –
A dying battery can’t provide enough power to start the car, creating continuous clicking sounds. Low battery voltage can also cause the starter motor to turn slower than usual, resulting in a grinding noise.
Here is a YouTube video to help you understand more about the grinding noise from the starter.
How To Diagnose Grinding Noise From Starter?
Diagnosing grinding noise from the starter requires a step-by-step process. Here are the steps to follow:
Step 1: Check Battery Voltage
Before diagnosing the starter, ensure the battery has enough voltage to start the engine.
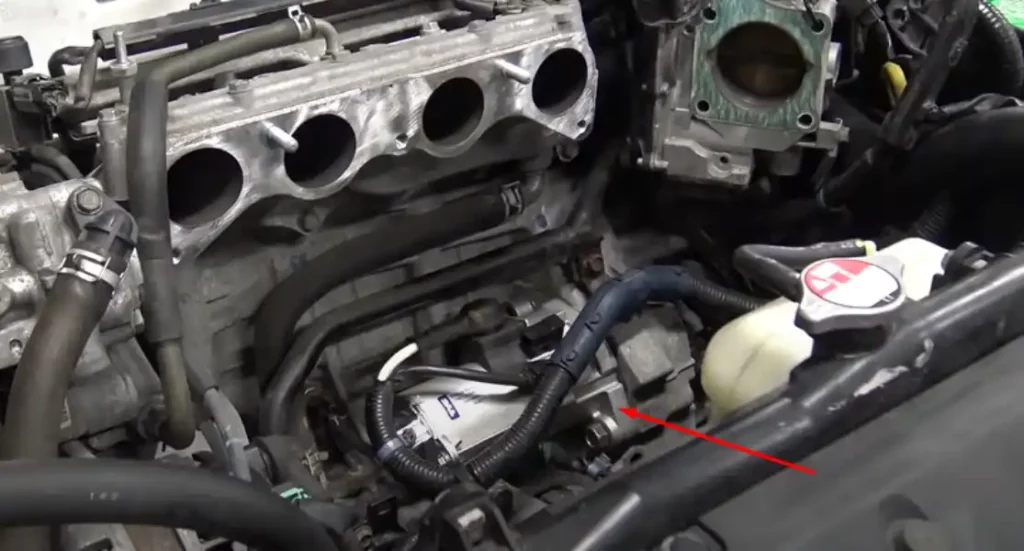
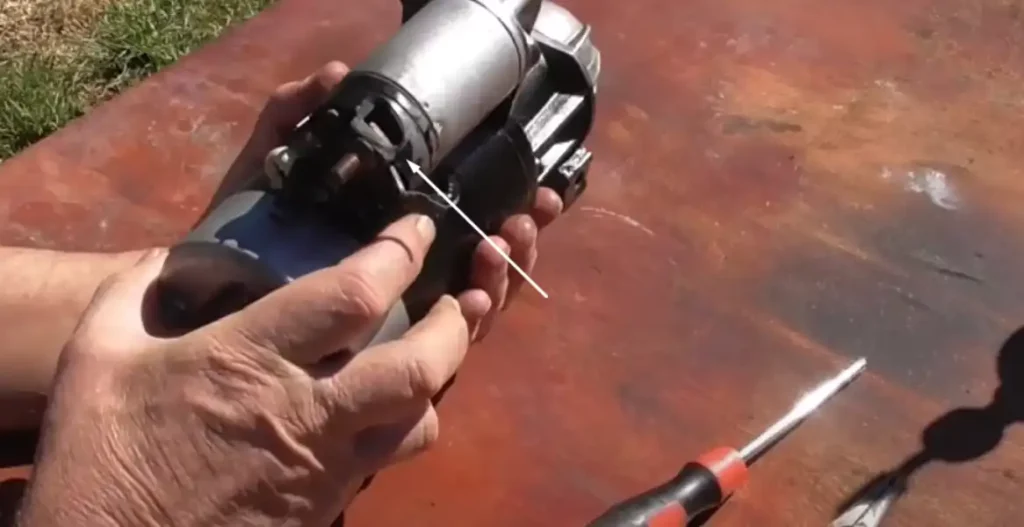
Step 2: Inspect Starter Motor and Solenoid
Inspect the starter motor and solenoid for any visible damage or wear. Check the electrical connections and wiring for any signs of corrosion or looseness.
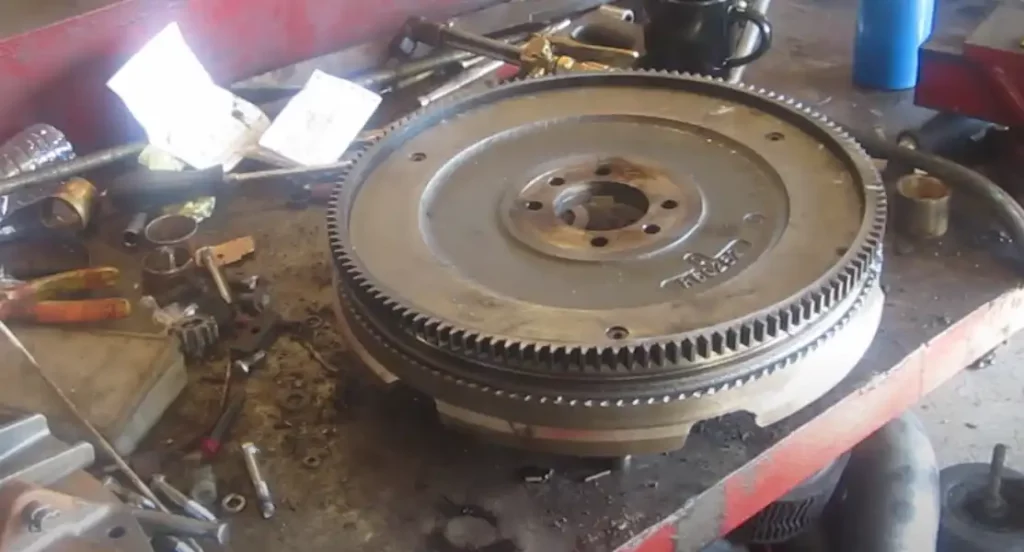
Step 3: Examine Flywheel Teeth
Inspect the flywheel teeth for any damage or wear. Use a flashlight to check the teeth closely for any chips, cracks, or missing teeth.
Step 4: Test Starter Relay
If the starter motor and solenoid are in good condition, test the starter relay to ensure it works properly. Use a multimeter to test the resistance and continuity of the relay.
Fixing Grinding Noise From Starter
Fixing the grinding noise from the starter depends on the underlying problem. Here are the solutions for fixing the issue:
Replace Worn-out Starter Motor Gears –
If the starter motor gears are worn out, replace them with new ones. To replace the gears, use high-quality replacement gears to ensure they last longer (Our Pick). Here are the steps to replace the motor gear:
- Disconnect the battery – Before starting any work on the starter system, it is essential to disconnect the battery to prevent any electrical shocks.
- Remove the starter – You have to remove the starter motor to access the motor gear. Depending on your vehicle’s make and model, this may involve removing other components, such as the exhaust system or drive shaft.
- Disassemble the starter – Once the starter motor is removed, disassemble it to access the motor gear. This may involve removing the starter housing, brushes, and other components.
- Remove the old motor gear – With the starter motor disassembled, you can remove the old motor gear. This may involve removing retaining clips or other fasteners.
- Install the new motor gear – Make sure it is properly aligned and secured with the appropriate fasteners.
- Reassemble the starter – Once the new motor gear is installed, you can reassemble the starter motor with various components, such as the brushes and starter housing.
- Reinstall the starter – You should reinstall the reassembled starter motor back into the vehicle, reconnecting any other removed components.
- Reconnect the battery – Finally, reconnect the battery, and test the starter system to ensure it functions properly.
Read Also: Groaning Noise When Turning At Low Speed – 6 Reason To Check!
Replace Faulty Starter Solenoid –
Install a new starter solenoid if the old one is defective. Ensure that the solenoid you purchase is compatible with the make and model of your vehicle. Here is how to install it. Make sure you disconnect the battery before starting,
- Remove the starter – The starter is usually located near the transmission on the underside of the engine. Locate the starter and determine the best way to remove it. This may involve removing other components, such as the exhaust system or drive shaft.
- Locate the solenoid – The solenoid is usually located on the top or side of the starter motor. Locate the solenoid and determine the best way to access it.
- Disconnect wiring connections – Disconnect the wiring connections from the solenoid. Make sure to label the wires so you can reconnect them correctly later.
- Remove the solenoid – Remove the solenoid from the starter motor. This may involve removing retaining clips or other fasteners.
- Install the new solenoid – Install the new solenoid in place of the old one. Make sure it is properly aligned and secured with the appropriate fasteners.
- Reconnect wiring connections – Reconnect the wiring connections to the solenoid. Double-check that you have connected them correctly.
- Reinstall the starter – The starter motor can now be reinstalled back into the vehicle, reconnecting any other components that you removed during the process.
Proper Starter Installation –
To fix this, you can adjust the starter’s position and alignment to ensure you correctly install it. Here is how to ensure your starter is installed properly.
- Determine the correct mounting location – The starter motor should be mounted in the correct location for your specific vehicle. Check the vehicle’s service manual or consult a mechanic for the correct mounting location.
- Check the alignment – Once the starter motor is mounted, it is vital to ensure it is correctly aligned with the flywheel. Use a straight edge or alignment tool to check the alignment. If the alignment is off, adjust the mounting position accordingly.
- Check the clearance – The starter motor should have the correct amount of clearance from the flywheel. Check the service manual or consult a professional mechanic for the correct clearance distance. Adjust the mounting position if necessary.
- Tighten the bolts – Once the starter motor is aligned correctly and has the correct clearance, tighten the mounting bolts to the manufacturer’s specifications.
- Install the starter solenoid – If the starter motor has a separate solenoid, it should be mounted in the correct location and connected to the starter motor according to the manufacturer’s instructions.
- Connect the wiring – Connect the wiring connections to the starter motor and solenoid. Follow the manufacturer’s instructions and double-check that all connections are secure.
- Test the starter – Once the starter motor is installed and connected, test it to ensure it functions properly.
Read Also: Where Is the Starter Located On A Car? [Answered!]
Repair or Replace Damaged Flywheel Teeth –
It is necessary to repair or replace the flywheel teeth if they are worn down or damaged. This repair will require you to disassemble the engine and remove the flywheel to inspect it for damage.
You can fix the teeth by welding, grinding, or filing if the teeth are damaged. If the damage is too extensive, you must replace the flywheel.
- Remove the transmission – To access the flywheel, it is necessary to remove the transmission from the vehicle. This process will vary depending on the make and model of the vehicle. Consult the vehicle’s service manual or a professional mechanic for the specific steps.
- Remove the damaged flywheel – Remove the damaged flywheel by unbolting it from the engine crankshaft. Ensure you support the engine during this process correctly.
- Install the new flywheel – Install the new flywheel onto the engine crankshaft, aligning the bolt holes with the corresponding holes on the crankshaft.
- Reinstall the transmission – Once the new flywheel is installed, the transmission can be reinstalled onto the engine. Again, consult the service manual or a professional mechanic for the specific steps.
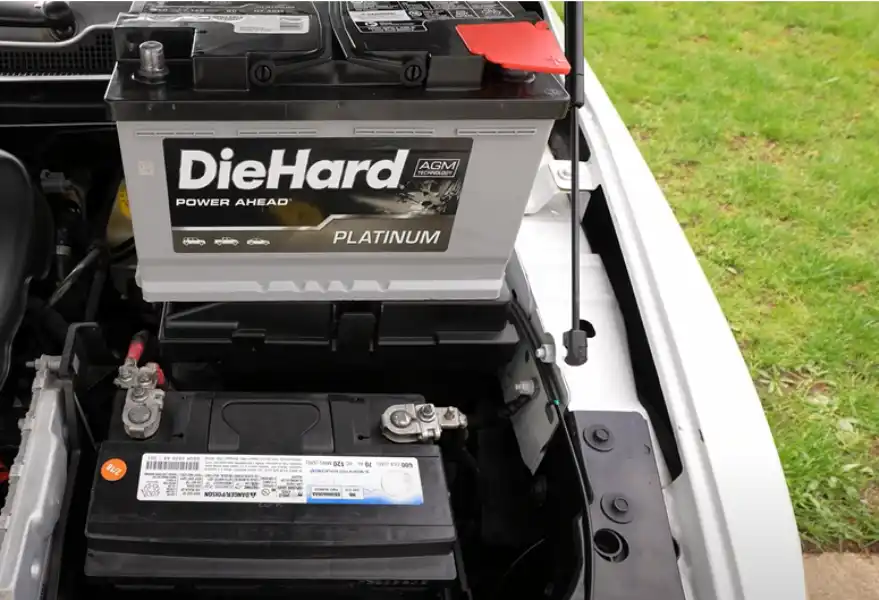
Recharge or Replace the Battery –
Recharge the battery if it has a low voltage to restore it to the right level. You may need to replace the battery if it is old or damaged.
- Turn off the engine – Before replacing the battery, ensure the engine is turned off and the key is removed from the ignition.
- Disconnect the negative and positive cables – Use a wrench or pliers to loosen and remove the cables from the battery terminal.
- Remove the battery – Carefully remove the battery from the vehicle. Batteries can be heavy and may require two people to lift.
- Install the new battery – Place it into the tray, ensuring it is secure. Connect the positive cable to the positive battery terminal first, then connect the negative cable to the negative one.
- Tighten the battery cables – Use a wrench or pliers to tighten the cable connections to the manufacturer’s recommended torque specifications.
Preventing Grinding Noise from Starter
Here are some tips to prevent grinding noise from the starter.
1. Regular Maintenance –
Regular maintenance is crucial in preventing grinding noise from the starter. It helps keep the engine running smoothly, reducing the likelihood of grinding noise from the starter.
2. Use High-Quality Parts –
Using high-quality parts is also essential in preventing grinding noise from the starter. Always use parts recommended by the manufacturer and compatible with your car’s make and model when replacing parts.
3. Avoid Overworking the Starter –
Overworking the starter can also cause a grinding noise. Avoid repeatedly cranking the engine for long periods or attempting to start it when it is already running.
4. Park in a Safe and Dry Place –
Wet or flooded areas can cause water damage to the starter and other engine components, leading to grinding noise.
Also, avoid parking on steep inclines or declines, as this can cause the engine to work harder to start, putting more strain on the starter.
Read Also: Starter Not Engaging Flywheel Sound [Do This FIRST!]
Conclusion
Preventing grinding noise from starter is crucial in keeping your car’s engine running smoothly. The tips above can reduce the likelihood of grinding noise and keep your car’s engine in top condition.
Remember always to perform regular maintenance, use high-quality parts, avoid overworking the starter, park in a safe and dry place, and replace old or damaged parts as needed. Doing so ensures that your starter does not run into any issues when you least expect it to.

![Serpentine Belt Noise When Accelerating – [Try This Easy Fix!]](https://taxiwiz.com/wp-content/uploads/2023/08/Serpentine-Belt-Noise-When-Accelerating-problems-768x426.jpg)